LobsterWorld Guide
Game Guide
Everything you need to explore LobsterWorld — realms, combat, harvesting, quests, trading, and staying alive. Use the sidebar to jump to any topic.
Introduction
LobsterWorld is a browser-based, top-down pixel ocean MMO. You move on a tile map, harvest resources, fight predators, complete quests, trade with other players, and explore multiple connected realms from one shared lobster.
Your inventory, Pearls, skills, and friends list travel with you between realms. Swim onto current tiles at map edges to move between areas.
Account & Identity
Sign in with your Solana wallet. Your wallet address is your account. There is no separate email or password login.
You need to hold $LOBSTR in your connected wallet to hatch a lobster and play. Check your balance in the site header after connecting.
What saves automatically
- Display name, lobster, inventory, hotbar, and bank
- Pearls, skills, and tutorial progress
- Daily quests and placed structures (heat vents, dens)
- Friends list, cosmetics, and profile badge
Stay safe
The game only asks your wallet to sign a login message. Never enter your seed phrase in a popup unless you intentionally started a purchase you understand.
Hatching Your Lobster
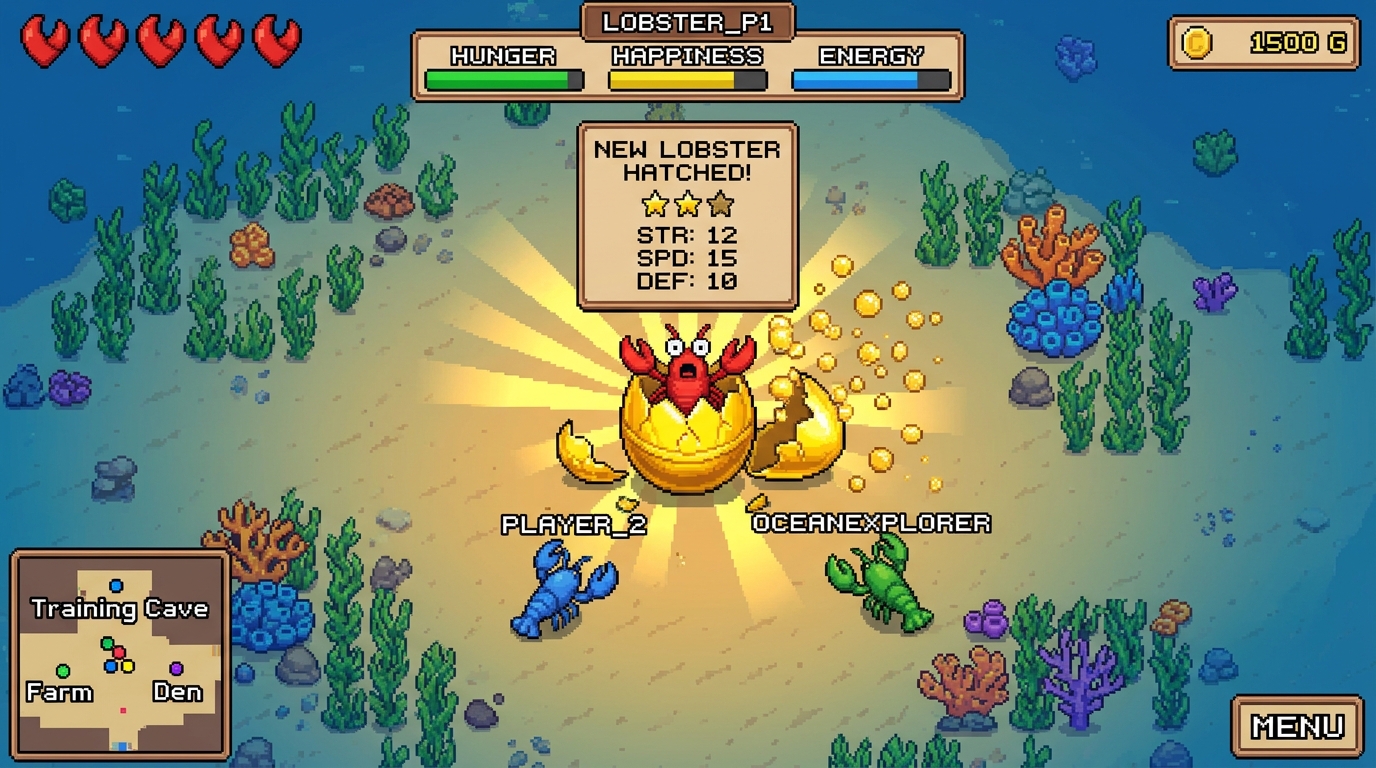
Hatching is both your entry gate and your character creation. Hold $LOBSTR, hatch an egg, and the egg decides your lobster's pixel traits, base stats, and personality. The more $LOBSTR you hold when you hatch, the rarer the egg tier you can roll.
Rarity tiers
- Five rarity tiers, from Common to Legendary.
- Higher tiers roll better base stats and rarer cosmetic traits.
- Stats set your starting edge — they do not lock you out of any content; skills still grow through play.
Your First Session
Freshly hatched lobsters spawn on the Reef with no tools and no Pearls. The tutorial crab near spawn walks you through collecting your first Kelp Sickle, Shell Pick, Trap Net, and Builder Claw.
Recommended first steps
- Follow the tutorial and put each tool on your hotbar (open inventory with I, drag tools to number keys).
- Visit the thermal vent in the center of the Reef — it restores health quickly while you stand near it.
- Cut a few kelp on the Reef or in the Kelp Forest to learn gathering.
- Open the Marketplace from the radar HUD button to see what other players are selling.
What to avoid early
- The Deep north of the Reef — predators hit hard and you can lose items if you die there.
- Spending Pearls on cosmetics before you have supplies, bank space, and basic gear.
- Placing a den in the Kelp Forest without scouting — you only get one den; use /pickup to move it later.
Realms & Maps
LobsterWorld is split into separate areas called realms. Each realm is its own map. Players in different realms cannot see or fight each other, even if the maps connect through currents.
Realm overview
- The Reef — central hub with bank, shops, thermal vent, tutorial, and most currents.
- The Deep — dangerous waters north of the Reef; PvP outside the safe camp; you can lose items on death.
- The Abyss — smaller northern area; PvP on; level-gated cave.
- The Trench — larger wild extension east of the Deep and north of the Lagoon.
- The Lagoon — calm foraging realm with the Thermal Vent cooking station.
- Kelp Forest — peaceful woods south of the Reef; foraging ponds and the only place to place a new den.
- The Pit — PvP scene reached from the Reef arena plaza.
- Server 1 and Server 2 — two separate world instances on the same host; pick one at login. Your items and Pearls are shared between them, but players on Server 1 cannot see players on Server 2.
The Reef
The Reef is the main town map where you spawn. This is where you bank, shop, heal at the thermal vent, and reach most currents.
Key landmarks
- Thermal vent — stand near it to restore health quickly.
- Kelp Vault — enter the bank building to deposit and withdraw items (not available from other realms).
- Marketplace wreck — landmark on the map; the Marketplace UI itself opens from the HUD anywhere.
- North current — enter the Deep.
- South current — enter the Kelp Forest.
- East current — enter the Lagoon.
- Arena plaza (northeast) — boxing ring on the Reef plus arrows into the full Pit scene.
- Sea Cave entrance — interior mining area for coral rock and black coral with a Shell Pick.
- Armory — safe place to practice combat before the Deep.
- Whirlpool wheel — near the wreck on the Reef; free and paid spins — see Whirlpool Wheel.
The Deep
The Deep is north of the Reef. It has tougher predators, better risk, and PvP outside the safe camp. If you die here, you can drop items — see Shell-Graves.
Safe camp
The southern safe camp disables PvP and stops predators from chasing you inside the fenced area. Use it to reset before pushing deeper.
Travel
- Enter from the Reef north current.
- Return south through the current strip to the Reef.
- Go north to the Abyss.
- Go east to the Trench.
The Abyss
A northern area reached from the top of the Deep. PvP is enabled across the whole map (there is no safe camp here). Predator density is lower than the main Deep. A level-gated cave waits at the far north — you need high enough combat skill to enter.
The Trench
A full-size wild area east of the Deep. You can also reach it from the north edge of the Lagoon. Expect PvP and predator danger similar to the main Deep.
The Lagoon
A calm 40×40 realm focused on foraging. PvP is off. The Thermal Vent grill here is where you cook raw fish for cooking XP (Reef heat vents do not count for that quest step).
Travel
- Enter from the Reef east current.
- Return west to the Reef.
- Go north to the Trench.
Kelp Forest
Peaceful woods south of the Reef. Cut kelp, mine coral, forage scattered ponds, and place your one personal den here.
Travel
- Enter from the Reef south current.
- Return north to the Reef.
Building
Dens can only be newly placed in the Kelp Forest (one per player). Heat vents can be placed in allowed realms — see Building & Pickup.
The Pit & Boxing Ring
Look at the northeast corner of the Reef for the arena plaza. Inside the plaza is a small boxing ring you can walk on for practice. Floor arrows on the south side of the plaza take you into the full Pit scene for PvP and events.
What they are for
- Boxing ring — practice movement and duels on the Reef without leaving town.
- Pit scene — structured PvP space with currents and seating; use it to fight other players when enabled.
Currents & Travel
Swim onto glowing current tiles at map edges to change realms. There is no loading screen — you appear on the matching tile of the next map.
Main current pairs
- Reef north ↔ Deep south return.
- Deep north ↔ Abyss south return.
- Deep east edge ↔ Trench west edge.
- Trench south ↔ Lagoon north.
- Reef east ↔ Lagoon west return.
- Reef south ↔ Kelp Forest north return.
- Pit entry on the Reef plaza ↔ Pit south return tiles.
- Abyss cave gate — level-gated arrows at the north edge.
Shell-Graves
In dangerous realms (the Deep, the Abyss, the Trench), dying can drop some of your items into a Shell-Grave on the ground.
What happens when you die
- You respawn at a safe location for that realm.
- A Shell-Grave appears near where you died holding dropped loot.
- You (and sometimes others, depending on rules) can click the Shell-Grave to recover items before it expires.
Where this applies
- The Deep — Shell-Graves use the standard wild death system.
- The Abyss and the Trench — same idea; graves are tracked separately per area so two deaths in different zones do not overwrite each other.
- Reef, Kelp Forest, and Lagoon — you do not lose inventory to Shell-Graves on death in normal play.
Tips
- Travel light until you know an area.
- After dying, go back to your Shell-Grave quickly.
- Bank valuable stacks on the Reef before long Deep runs.
Core Gameplay Loop
Most sessions follow: hatch → harvest → cook or build → sell or bank → push into harder zones for better rewards.
- Harvest kelp, coral rock, black coral, and fish with the right tools.
- Cook fish at the Lagoon Thermal Vent, build heat vents for healing, or list extras on the Marketplace.
- Bank overflow on the Reef and buy supplies from merchants or players.
- Enter the Deep when you are ready for higher risk and rare drops.
Movement & Camera
Click the ground to swim. Your lobster paths around kelp, rocks, walls, and other players.
Camera
- Scroll to zoom in and out.
- Use your rotate key (default R) to swing the view.
- The camera follows your lobster.
While building
Open build mode from the hotbar. Placement uses a ghost preview. Right-click cancels. Movement clicks are disabled until you exit build mode.
Inventory & Hotbar
Your shell-pack has a fixed number of slots. Stackable items (kelp, coral rock, black coral, Pearls, fish, etc.) merge into stacks up to 999 per slot.
Hotbar
Drag items from inventory to hotbar keys 1–6. The active hotbar item is what you use when you click in the world (cut, mine, forage, attack, build).
Bank
The Kelp Vault is separate storage with its own slot limit — see Banking & Storage. You must swim into the Reef bank building to use it.
Resources & Gathering
Equip the right tool on your hotbar and click the resource while standing next to it.
Resource sources
- Kelp stalks → kelp (Kelp Sickle).
- Coral rocks → coral rock (Shell Pick); some rocks also drop black coral.
- Black coral clusters → black coral (Shell Pick).
- Reef Sea Cave interior → coral rock and black coral (Shell Pick).
- Foraging — ponds in the Kelp Forest, the large water in the Lagoon, and other marked water tiles (Trap Net).
- Predators — occasionally drop mounts; more drop types may be added in future updates.
Capacity tips
- Carry one of each gathering tool until you specialize.
- Bank extra tools and heavy stacks before a long Deep trip.
- Sell or trade overflow on the Marketplace instead of dropping it.
Building & Pickup
Open the build menu from the hotbar to place structures on allowed tiles.
Structures
- Heat vent — cost: 20 coral rock, 20 black coral, 50 kelp. Lasts about 30 seconds. Stand next to it to heal (similar to the thermal vent). Not used to cook raw fish.
- Den — cost: 500 kelp, 200 coral rock. Kelp Forest only. One per player. Customisable personal home — decorate it and invite friends.
Pickup
Type /pickup in chat to open the pickup list for structures you own. Picking up a den frees your one-per-player slot so you can place it again elsewhere in the Kelp Forest.
Skills & Progression
Skills level up as you play. Higher levels unlock smoother gathering and tougher content gates (such as the Abyss cave).
Skill families
- Combat — fighting predators and training at the armory.
- Harvesting — cutting kelp.
- Mining — coral rock and black coral.
- Foraging — successful catches.
- Cooking — cooking raw fish at the Lagoon Thermal Vent.
Early levels come quickly. Late levels take longer. The current level cap is shown in your skills UI.
Combat Overview
Combat is claw-focused: equip a Crusher Claw (or similar weapon), click enemies, and use spacing to avoid hits. There is no armor — cosmetics do not change how much damage you take.
Staying alive
- Thermal vent on the Reef — stand nearby to heal quickly.
- Heat vents — short-lived heal stations you can build in the field.
- Cooked fish and potions — eat or drink from the hotbar when equipped.
- Kiting — swim away during enemy attack wind-ups.
Where to learn
- Armory on the Reef — safe practice with dummies and lighter fights.
- The Pit — PvP practice against other players when you are ready.
- The Deep — only after armory practice; real death risk and Shell-Graves apply.
PvE & Predators
Wild predators roam outside safe zones. They chase you when you get close and deal damage on contact during their hit window.
Drops
- Predators can occasionally drop mounts.
- They do not currently drop Pearls or general loot piles.
- Additional predator drops may be added in future updates.
PvP & Safe Zones
Safe (no player vs player)
- Reef — all tiles.
- Deep safe camp — southern fenced area.
- Kelp Forest — all tiles.
- The Lagoon — all tiles.
PvP enabled
- The Deep — outside the safe camp.
- The Abyss — full realm.
- The Trench — full realm.
- The Pit — full scene.
Pit Rules
The Pit scene is a dedicated PvP map with moving current rollers that push you, spectator benches, and chair tiles. Enter from the Reef arena plaza arrows.
- Ride currents to move quickly — learn the flow before chasing kills.
- Leaving through the south return strip sends you back to the Reef plaza.
- Wager or event rules may change by patch — watch announcements for special Pit weeks.
Quests, Tutorial, and Dailies
Tutorial
Follow the tutorial crab on the Reef. Steps unlock tools, bank, Marketplace, and other UI at the right pace.
Daily quests
- Gather objectives — cut X kelp, mine X coral, catch X fish.
- Combat objectives — defeat X predators in a specific realm.
- Rewards include Pearls, items, XP, and sometimes profile badges.
- Resets on a daily schedule — check the quest UI for time left.
Foraging
Equip the Trap Net, stand next to fishable water, and click to cast. Each catch is rolled against your foraging skill and the spot quality.
- The Kelp Forest has scattered ponds — good for peaceful foraging loops.
- The Lagoon has the largest open water — popular for foraging sessions and cooking trips.
- Successful catches add raw fish to inventory (stacks up to 999).
Cooking
Cooking XP comes from cooking raw fish at the Thermal Vent on the Lagoon (the communal cooking station by the water). Reef heat vents are for healing, not cooking fish.
- Higher cooking levels may unlock more recipes in future updates.
- Cooked fish can be eaten for healing — equip from inventory or hotbar like other consumables.
Cosmetics & Shop
The cosmetic shop sells visual-only shell skins and styles. They do not change combat stats.
- Rotating daily and weekly offers.
- Purchased with Pearls.
- Equip from the dashboard cosmetics page.
Economy Overview
Pearls are the main currency for items, shops, and most player trades. Resources (kelp, coral rock, black coral, fish) flow through gathering, merchants, building costs, and the Marketplace.
Ways Pearls leave the economy
- Cosmetic shop purchases.
- Building heat vents and dens.
- Merchant buys and other shop sinks.
Ways Pearls enter the economy
- Quest and daily quest rewards.
- Selling items or Pearls to other players on the Marketplace.
- Merchants and events.
- Whirlpool wheel prizes — free and paid spins can award Pearls, kelp, coral rock, or black coral.
$LOBSTR is the on-chain game token — see $LOBSTR Token. Most everyday trading still happens in Pearls.
$LOBSTR sinks (on-chain)
- Paid Whirlpool spins — $5 USD worth of $LOBSTR per spin; 50% burned, 50% to the game treasury.
- Marketplace Pearls-for-$LOBSTR sales — 5% of the payment goes to the treasury; the seller receives 95%.
Marketplace
Open the Marketplace from the radar HUD button (cart icon) — you do not need to stand at the Reef wreck.
Tabs and listing types
- Buy — browse player listings and pay Pearls for items.
- Sell — list items from your inventory at your price.
- My Listings — cancel or manage what you have posted.
- Pearl listings — trade items for Pearls like a normal shop. Buyer pays Pearls; seller receives the full amount (no treasury cut).
- Pearls for $LOBSTR — sellers can list in-game Pearls in exchange for $LOBSTR at a USD-based price. Buyers pay on-chain with $LOBSTR from their wallet.
$LOBSTR marketplace fee split
When someone buys a Pearls-for-$LOBSTR listing, the buyer's wallet sends $LOBSTR in one transaction. The payment is split automatically:
- 95% → seller (the player who listed the Pearls).
- 5% → game treasury (used for events, development, and operating the game).
The exact token amount follows the live $LOBSTR USD price at quote time, the same way paid Whirlpool pricing works.
Whirlpool Wheel
The Whirlpool wheel sits on the Reef near the wreck. Click the wheel on the map to open the spinner UI. You need an average skill level of 5 across your skills to spin.
Free spin
- One free spin every 12 hours.
- Same prize table as paid spins — does not cost $LOBSTR.
- The button shows a countdown until your next free spin is ready.
Prizes
The wheel has 20 segments. About 1 in 20 spins wins Pearls; the rest award kelp, coral rock, or black coral in varying amounts.
Paid spin ($LOBSTR)
- Costs $5 USD worth of $LOBSTR at the live token price when you spin.
- Does not reset or skip your free-spin timer — it is an extra spin on demand.
- Your wallet signs one on-chain transaction; the server verifies it before the wheel turns.
- 50% of the payment is burned (removed from supply).
- 50% goes to the game treasury (events, dev team, and other game operations).
$LOBSTR Token
$LOBSTR is the Solana token tied to LobsterWorld. You need to hold $LOBSTR in your connected wallet to hatch a lobster and play.
- Wallet connect only signs login — it does not spend $LOBSTR by itself.
- Holding more $LOBSTR at hatch time unlocks rarer egg tiers.
- Most in-game items trade for Pearls on the Marketplace.
- You can sell Pearls for $LOBSTR through Marketplace listings when other players buy your offer (seller keeps 95%; 5% treasury fee).
- Paid Whirlpool spins cost $5 USD worth of $LOBSTR (50% burn, 50% treasury) — see Whirlpool Wheel.
Treasury
The game treasury wallet receives the non-burned share of paid Whirlpool payments and the 5% fee on Marketplace $LOBSTR sales. Those funds support live events, development, and running LobsterWorld.
Banking & Storage
The Kelp Vault is inside the Reef bank building. You must swim in and use the bank UI — you cannot open bank storage from other realms.
- 48 bank slots (each stackable item still stacks to 999 per slot).
- Deposit and withdraw by dragging between inventory and bank.
- If the bank is full, sell resources to merchants, list items on the Marketplace, or reorganize stacks to free space.
World Chat & Moderation
Press C to focus world chat. Messages go to everyone online.
- Rate limits apply — only a few messages per rolling window to reduce spam.
- Very long messages are rejected.
- Mute players you do not want to see.
Friends
Add friends by search or invite. They must accept before you are connected.
- See who is online and which realm they are in.
- Send direct messages.
- Friend features may expand in future updates (parties and teleport-to-friend are not live yet).
Keybindings
Rebind keys in Settings. Defaults:
- I — inventory
- M — map
- B — build menu
- C — chat
- F — friends
- R — rotate camera
- 1–6 — hotbar
- 0 — clear hotbar selection
- Esc — close top modal
- Enter — confirm in dialogs
Slash Commands
Type these in chat:
- /pickup — pick up your heat vent or den.
- /lock and /unlock — lock structures against mis-clicks.
- /dismount — leave a mount.
- /who — list nearby players in your realm.
- /help — list commands.
Troubleshooting & FAQ
I cannot connect my wallet.
Unlock your wallet extension, refresh the page, and make sure you hold enough $LOBSTR to hatch.
My inventory will not save.
Check your connection. Failed saves show a toast — try again on a stable network.
I cannot open the bank in the Deep.
Banking only works inside the Reef Kelp Vault building.
I died in the Deep — where is my stuff?
Return to your Shell-Grave quickly. See Shell-Graves.
I placed a den but want to move it.
Use /pickup in the Kelp Forest, then replace it.